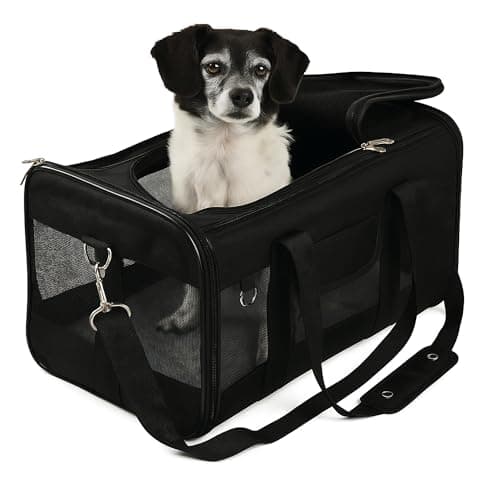
The single most useful fact about flying with a dog is this: at the security checkpoint, you take the dog out of the carrier. The carrier goes through the X-ray machine empty and the dog goes through the metal detector in your arms. People who do not know that arrive at the belt holding a zipped bag, get told to open it in a crowded line, and spend the next minute wrestling a frightened dog in public.
Everything else about the checkpoint is ordinary. Here is the sequence, and the small amount of preparation that makes it a non-event.
Before any of this there is the ride to the terminal, which has its own rules worth checking the night before: taking a dog in an Uber or Lyft.
What TSA actually does
TSA's published guidance is specific and it has not changed in years:
- Take the pet out of the carrier just before screening starts. Not earlier, in the queue, and not at the belt while people wait behind you.
- Put the empty carrier on the conveyor belt to be X-rayed. A pet is never put in the X-ray tunnel - that machine screens property and carry-on bags only.
- Carry the pet through the walk-through metal detector if you can. A dog that is on a leash may walk through instead. Either way it stays under your control the whole time.
- Expect a swab of your hands. An officer will run an explosive trace detection swab over your hands afterwards. It takes seconds and it is routine, not a sign anything is wrong.
- Ask for a private screening room if your dog is a bolter. TSA explicitly offers this for pets likely to struggle or jump away when they come out of the carrier. It costs you two minutes and removes the entire risk of a loose dog airside.
The failure mode worth planning around is a dog slipping its collar in the one place you cannot chase it. Put a well-fitted harness on before you leave home and keep a leash attached to it from the moment the carrier opens. A collar that a panicked dog can back out of is the wrong hardware for a checkpoint.
The order that makes it easy
Do your own divesting first. Shoes, laptop, liquids, belt, everything into a bin and onto the belt before you unzip the carrier. Then open the bag, lift the dog, clip the leash to your wrist, and send the empty carrier through. You want the dog out of the bag for the shortest possible time, which means being ready when it comes out.
Two adults make this trivial - one manages bins, one manages the dog. Alone with a dog and a rolling case is the version that takes practice, so give yourself the extra fifteen minutes rather than doing it at a jog.
Once you are through the checkpoint, the next question most people have is what the flight itself does to a dog. The honest version - what the cabin pressure rule actually requires, and where the evidence runs out - is in do dogs' ears pop on planes.
Airport relief areas: where they are and what they are for
Under US Department of Transportation rules, airlines must - in cooperation with the airport operator and in consultation with local service animal training organizations - provide animal relief areas for service animals traveling on their flights (14 CFR 382.51). The rule is written for service animals. In practice, most US airports signpost these areas as pet relief areas and pets use them, and larger airports have them both landside and past security.
What that means for you: look up your specific airport's relief area locations before you fly, including the airside one, and check your connecting airport too. Terminal maps on the airport's own website list them. A long connection with no plan is where accidents happen, and an accident in a carrier is a bad start to the second leg.
- Use the landside area right before you go through security, even if the dog does not seem to need it. That is the last easy opportunity.
- Carry bags on your person, not in the checked bag. A dispenser clipped to the leash means you always have one; the roll in the suitcase is the roll you do not have.
- Take wipes. Relief areas are indoor rooms with artificial turf at many airports. Cleaning paws before the dog goes back in the carrier keeps the carrier - and your seat area - liveable.
Before you leave home
- Walk the dog properly, then withhold a big meal. A light meal several hours before, water right up to boarding. A full stomach plus stress plus a pressurized cabin is the combination that produces sickness.
- Practice the lift. Take the dog out of the carrier and put it back in, at home, twenty times over two weeks. The checkpoint should be the boring version of something the dog has already done. Our calming guide lays out the acclimation schedule.
- Check the ID. A tag with a phone number that works while you travel, and a microchip whose registration is current. See travel ID tags and microchip versus GPS tracker.
- Know your carrier opens from the top. Lifting a dog vertically out of a top hatch is far easier in a queue than coaxing it through an end panel, and it is the main reason our checkpoint pick is a top-opening carrier.
At the gate and on board
Board when your group is called rather than first - less time sitting in a hot cabin at the gate. The carrier goes under the seat in front of you for taxi, takeoff and landing, and it stays there. Do not put it on the seat, do not open it in flight, and do not put it in the overhead bin, ever.
If the dog whines on climb-out, that is usually pressure and it usually passes. A hand resting on the mesh does more than anything you can say. The whole in-cabin process, from booking to landing, is in how to fly with a dog.